Showing posts with label learning calligraphy. Show all posts

Tuesday, September 8, 2015

Opening Up Shop : wisp + whim calligraphy


Last week, I finally acted on a little dream of mine that I've had for years: opening an Etsy shop. 


Honestly, I didn't even really plan to do this last week. I'd had the name saved for a couple months but had been debating recently on whether Etsy was really the right platform for me and what I currently have to offer. (And, let's be really real, I was afraid of pulling the trigger, of putting myself out there and risking failure. Plus, there were those ever-present nagging feelings of not being good enough, especially when compared to other calligraphers whose work I admire.)

Maybe I was feeling a bit bold or simply curious, but last Tuesday I decided to just see how the process would work for setting up a listing. I made one listing and, in no time at all, four more. At that point, I handed over my bank account information and officially opened up shop. Click! It was so easy. Several hours later I had refined the look of the online store, added an "About" page and shop policies. While I still would prefer to have my own, dedicated website, you really can't beat Etsy's ease of use and low up-front cost. For someone like me who's just starting out, minimal risk and investment sounds good.

At this point, all the items listed are custom services: envelope addressingcalligraphed escort and place cards and event signage like hand-lettered chalkboard wedding signs, buffet and dessert table cards and other calligraphed paper signs


In addition to the services listed, I will happily accept custom orders! I'd love to take an idea and turn it into reality. Calligraphy really can go beyond just paper and ink; almost anything can be written on!

In the next few months, my goal is to add some ready-made, ready-to-ship products to the shop lineup as well. In the meantime, I'd love it if you'd check out my new online storefront and let me know what you think! 


Finally, I would be remiss if I didn't offer up my heartfelt love and thanks to the friends and family who have supported and encouraged me in my calligraphy journey, especially my sweet husband who is always trying to drown out those nagging feelings of self-doubt stirring within me, to (gently) push me to be my best self and pursue my wildest dreams.


P.S. As you may already know, I have a calligraphy-focused Instagram, but I now also have dedicated Facebook and Twitter profiles, too. Likes and follows much appreciated :)

All product images, except envelopes, 
courtesy a wisp + whim bride, captured by Simply Perfect Images

Tuesday, August 25, 2015

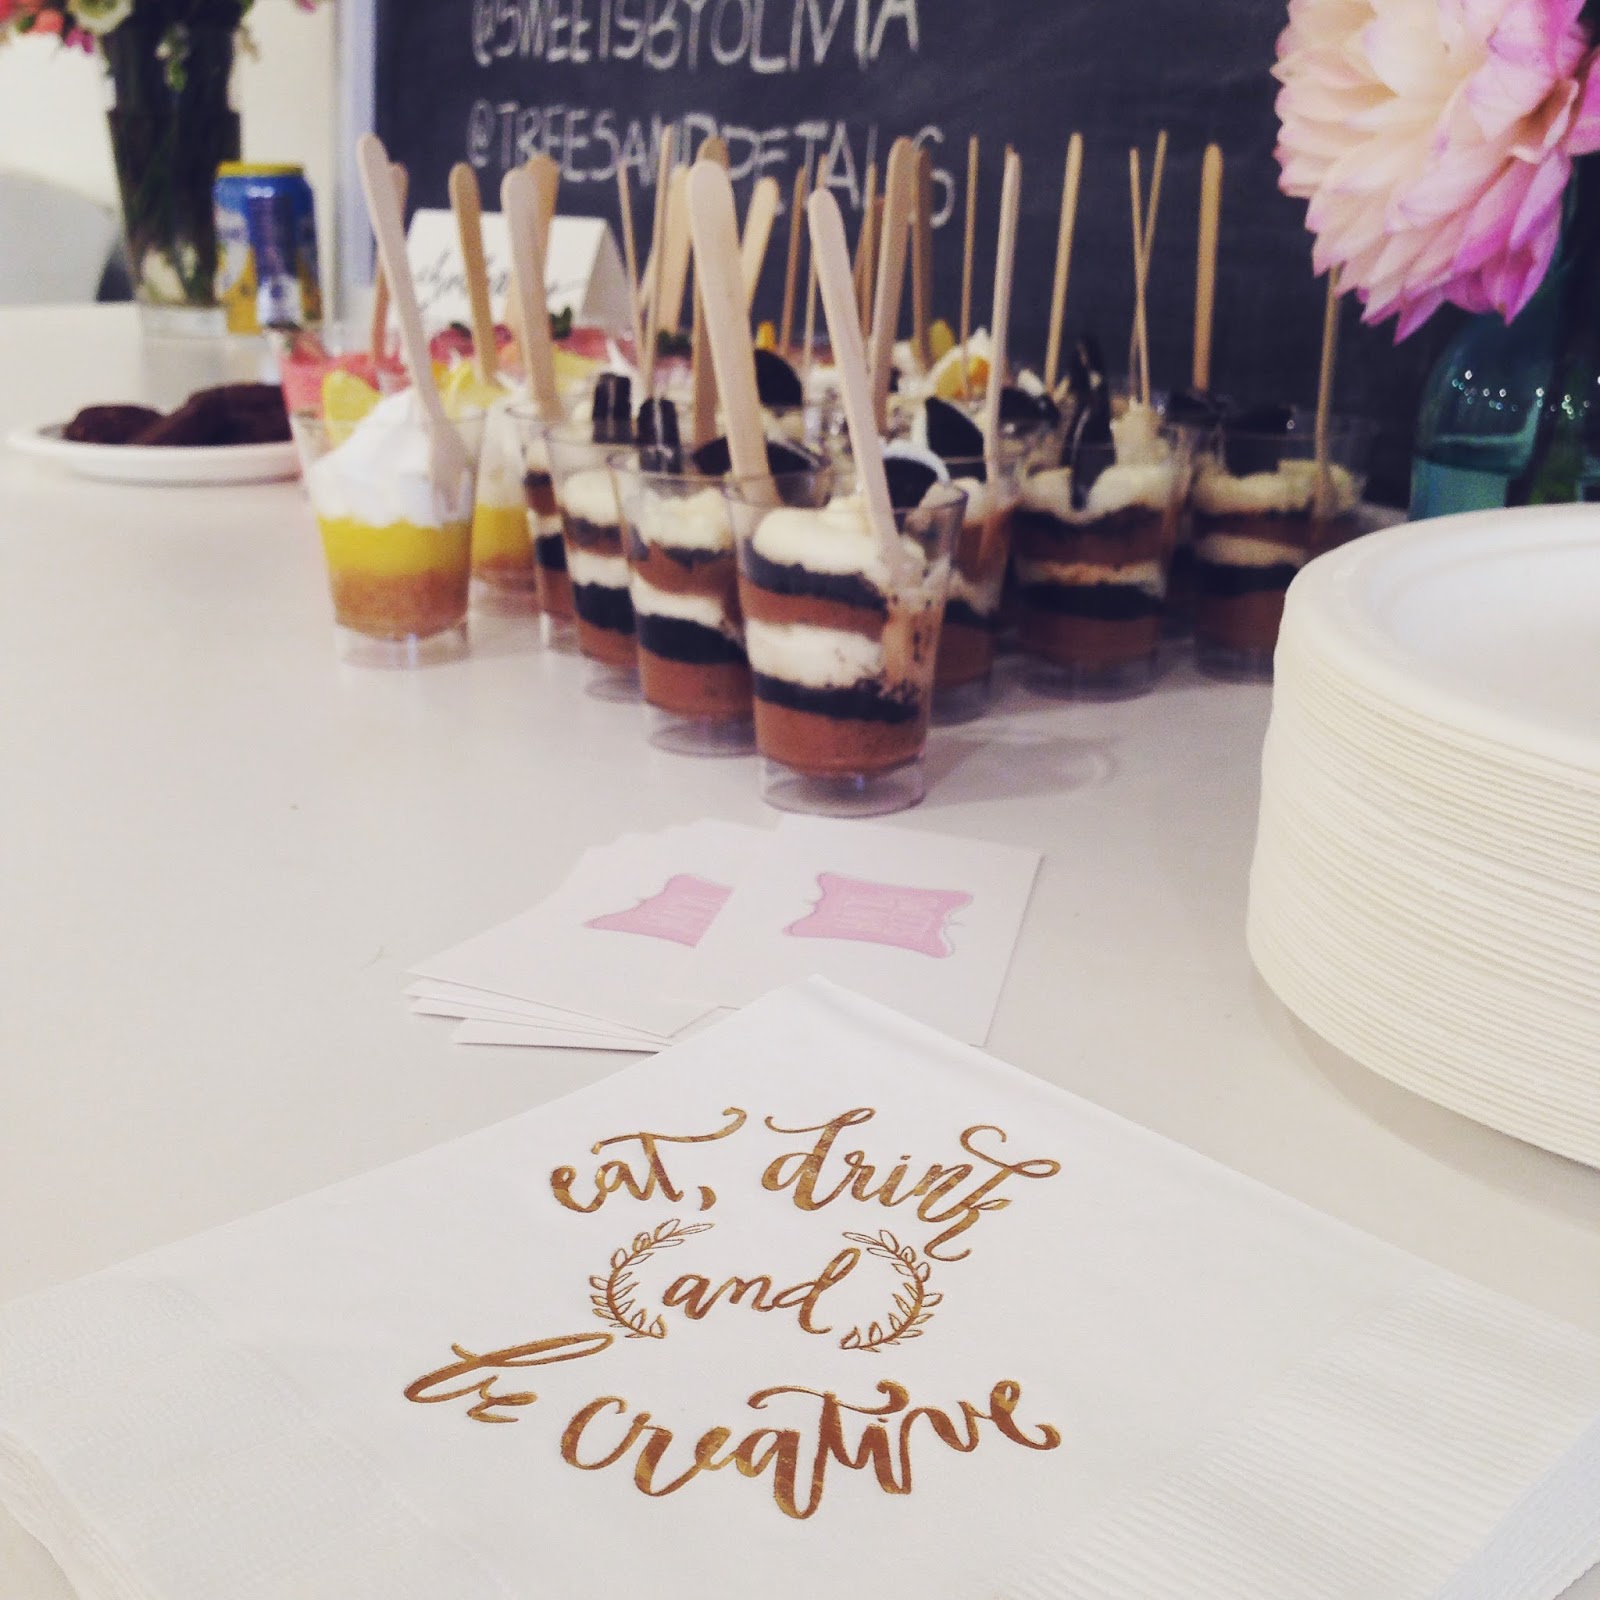
Eat, Drink & Be Creative : A Laura Hooper Calligraphy Workshop in NYC


I’m about 10 months into my calligraphy journey, and while I am not always as diligent as I should be about practicing every single day, and I tend to be more critical of my work than I should be (my husband says), I have completely fallen in love with the craft.

Thus far, I've learned the art of modern calligraphy by watching Skillshare classes, reading books/magazines/blogs on the subject, following other calligraphers on Instagram, and by practicing on my own, trying out different pens, nibs, inks and techniques.

Finally, this past Sunday, I had the pleasure of attending my very first in-person calligraphy workshop, a Laura Hooper Calligraphy Intermediate Workshop. If you know calligraphy, you know Laura Hooper and her beautiful, flourished, fancy-but-still-approachable scripts. When I saw that she was hosting beginner and intermediate classes in NYC, I jumped at the chance to learn from one of my calligraphy idols, and my sweet hubby thoroughly supported the investment.


Sunday afternoon’s workshop was held at The Lofts at Prince, in the hip and fashionable downtown neighborhood of SoHo. Myself and 23 other ladies attended the nearly three-hour class, during which we brushed up on our flourishing skills, learned about mixing inks and asked all the technical- and business-related questions we could come up with. Since we already knew the basics of calligraphy—how the nib works, how to form letters—the intermediate session was very unstructured. Less like a class and more like a free-flowing dialogue with a seasoned pro. (Watch Laura write my name!)

Truth be told, I was incredibly nervous leading up to the workshop. I was worried about getting there (I’m still a newbie when it comes to public transportation and navigating myself around NYC, but I successfully took the bus and then the subway from Jersey to SoHo) and I was worried that, once there, I’d be the worst in the class. That whole hypercritical thing. But I told myself to just relax and enjoy the experience, that I wasn’t going there to prove anything but simply to learn. 

Perhaps it was the cocktail I had at brunch or maybe just the welcoming, informal vibes coming from Laura and her sister/director of operations Alyssa, but once I arrived to the workshop all my nerves melted away and I had a wonderful time. It was a treat to hear tips and tricks from a talented, well-respected and successful calligrapher but it was also a joy to simply spend an afternoon with other women who love calligraphy as much as I do.


As for whether I was the worst person in the class, well, I couldn’t even see most of the other students’ work, so who knows how I compare. (It really isn’t important and, as I know well, comparison is the thief of joy!) But the kind woman sitting across from me during the workshop told me, unprompted, while we said our goodbyes, that my calligraphy is beautiful and that I “should do something with that.” 

My husband tells me the same thing all the time, but for some reason—right or wrong—a compliment from a perfect stranger always hits you in the heart as more true. I’m sure Virginia has no idea how much her words meant to me, but they were a highlight of what was a perfect day of learning and creating.


P.S. Sweets by Olivia provided the delicious dessert shooters for the workshop and Trees & Petals supplied all the gorgeous blooms that decorated the room!

Wednesday, April 8, 2015

Wedding Wednesdays : Hand-lettered Signs & Cards

[ A dressed-up envelope to accompany a special, glittery card for the newlyweds. ]

After deciding to learn calligraphy last fall, my best friend quickly informed me that she'd love to put her maid of honor's newfound skills to work creating signage for her wedding. And in the two weeks leading up to her March 27th Malibu nuptials, put to work I was! I hand-wrote three chalkboard signs; two for the ceremony space and one for the bar. It was my first time ever using chalk markers and, while I'm sure there's a better way, I freehanded each of them. Several hours were spent on each one. I also lettered or calligraphed smaller, framed paper signs (for the gift table, the escort card table, and one with their wedding hashtag) as well as place cards for the dessert and snack bar so guests would know which cookies were chocolate chip and which were peanut butter, and so on. The treat table signs were whipped up, no joke, at 2 a.m. the morning of the wedding at the request of a bridesmaid who was heading up the last-minute "Mission: Dessert Table." (Funny enough, I was happiest with how these tired-eyed pieces came out. I guess I was too exhausted to overthink them.) In addition, I created a personalized card for Marielle to give JP on their wedding day.

Finally, perhaps my biggest task, was painstakingly calligraphing 105 escort cards with guests full names in black Sumi ink and table numbers in gold (and then helping the bride stick on glittered tape to distinguish who was getting beef, fish or vegetarian). Initially I planned to break this massive project up into chunks, but due to time constraints I ended up writing all the names in one day and then writing the table numbers the next.

I am a perfectionist to a fault and my own worst critic, so while some of the projects didn't ultimately meet my high, self-imposed standards—I feel I could have done better on the escort cards if I'd had more timethe bride and groom were absolutely thrilled with everything and I heard that some of the wedding guests even commented on my work, thinking it was created by a professional or store-bought. So I know I need to cut myself some slack and be proud of all that I did create, especially since I'm still learning and it was my first time doing many of the projects. (I didn't even do all this sign-making work for my own wedding! Though still a big undertaking, the menus, dessert table signs, and favor tags/escort cards were simply written in my own, natural hand and the chalkboard signs were created by our very kind catering coordinator.)

Without further adieu, I thought I'd share a few photos of my work. I'm looking forward to seeing my bestie's professional shots when she gets them in! While it was, at times, a bit stressful taking on all these projects, it was a true labor of love for my very favorite lady.


Thanks for looking and reading! If you are interested in learning calligraphy, I would suggest taking Molly Jacques' Skillshare class. (Use my referral link to get a free month of membership with unlimited access to all Skillshare classes.) And my No. 1 tip is practice! I got a lot of practice making all those little signs, and multiple versions to boot, not to mention writing all those escort cards :)

P.S. You can follow along on my calligraphy journey on Instagram! Find me posting my latest creations and practice sessions at @wispandwhim.

Monday, January 26, 2015

Learning Calligraphy & My 365 Project


I've always loved making pretty letters. As a kid I would frequently change the way I wrote my name and, in particular, the way I wrote my lowercase "As" (with a "hat" or without, with a straight "tail" or a curvy one). I also always bemoaned the fact that my name wasn't very fun to write. No loops. No "Ls" or "Ys" to swing and curl around. Nope, my maiden name did not grant my hand a lot of ascenders or descenders to play with (though, of course, I didn't know the proper terminology at the time). Nevertheless, I enjoyed writing other people's names, and as I got older I became known for the embellished cards and envelopes that were attached whenever I presented someone with a gift. (I even served as the sunshine chair for my sorority in college, because the entire job description was to brighten my sisters' days with notes, cards, and gifts.) But these were simple, untrained doodles. It was all very unserious, just for fun, and honestly, part of me didn't think I was capable of doing much more.

But that changed last fall. In September, I decided to get a little more serious. I decided to learn calligraphy.

I'm not exactly sure how I came upon this decision. I think it was just the inundation of pretty lettering I saw on Instagram, Pinterest, and even Facebook. I saw so many people writing beautiful scripts, lettering inspiring quotes, creating pretty personalized details for wedding and events, and I thought that maybe I could learn the skill, too, after all, if I put my mind to it.

With the help of Google, I researched all I could about learning calligraphy, the tools I would need and what online resources were available to me. And I happily discovered that learning calligraphy doesn't require a huge investment up front. Sure, you can spend a pretty penny buying beautiful pen holders and inks and fancy papers but you definitely don't need that to start. A pen holder, a nib, a pad of practice paper and a pot of black ink will set you back 20 bucks, tops, and you're on your way.


My extensive research also led me to two highly-rated online calligraphy classes: Molly Jacques' Skillshare class, Introduction to the Art of Modern Calligraphy, and Melissa Esplin's I Still Love Calligraphy workshop. While I wanted to join Melissa's course due to the personal coaching and feedback element, at $95 (or $130 with the supplies) the cost was a bit too much for my unemployed self to justify, especially if I didn't stick with it. Instead, I opted for Molly's Skillshare class since it was just $20 (if I remember correctly) or free if I signed up for a Skillshare membership ($10/month, but I got the first month free as a trial run and I've recently upgraded to a premium membership).

[ Snapshots from my early days. Watching videos, taking notes, and practicing letterforms over and over.]

I thoroughly enjoyed Molly's videos and found them extremely helpful. But once you learn the basicshow to hold and use the pen and nib, creating downstrokes and upstrokes—the most important step is practicing. That is the only way you will get better. And in our instant gratification society that step is tough, because we want to be as good as all those images that inspired us to start learning calligraphy in the first place. I know I did and still do. But it just takes time. It takes time and mistakes, splatters and spills and inky fingers, and some frustrating practice sessions where it feels like you can't make anything look good. Been there, done that. But there are days when you love and are proud of what you create, and that makes the not-so-good days worth it.

[ Mini calligraphy signs I made over the holidays to brighten up our apartment. ]

While I was practicing fairly regularly last fall, there were weeks when I didn't pick up my calligraphy pen. Partly because of the busyness of the holidays, but mostly because we had no dedicated space for me to lay out all my supplies, and keep them laid out, for practice. (My wonderful husband subsequently let me take over the dining room table as my creative space, so that problem has been solved!)

To encourage daily practicing, and to keep myself accountable, I made it a goal for 2015 to launch and complete a 365 project—a year of calligraphy. There are not many things I do every single day. I don't even blog every day. But this project requires me to put nib to paper daily. I began my project January 12 and sometimes I think, "What did I get myself into?" But in just 14 days I've already seen some improvement. And I'm having fun trying new nibs and inks and papers. I'm relishing the process of creating.

[ Some of my 365 project work thus far. ]

To document my project, I started another Instagram account, separate from my personal profile. If you'd like to follow me on my calligraphy journey, my year of lettering, you can find me posting my daily practices and creations at @wispandwhim. My plan is to have a new theme each month to inspire my work. January is all about fresh starts and bold steps, in honor of my New Years resolutions and word for 2015. February, which is fast approaching, will appropriately be all about love.

[ A quote that is true of life and true of learning calligraphy. ]

If you've been thinking about learning calligraphy as well, I would encourage you to check out Skillshare (which has tons of other classes in design, photography, DIY and more). Use my referral link to get a free month of Skillshare membership with unlimited access to hundreds of classes. (When you use my link, I get a free month too! Win win.)

With that, I propose a toast (grab your cup of coffee or tea!): Here's to pursuing new, exciting and challenging creative endeavors, and following wherever they may lead.


Blogging tips